An Updated Dresser

Posted on

I’ve had the same dresser for just about my entire life and noticed the other day how desperately it needed some TLC.

Knobs were severely outdated, drawers scratched and laced with remnants of my glitter-glue obsessed preteen years (I know, right??)

So this delightfully sunny Monday afternoon I set out to bring my dresser back into the 21st century. Originally I wanted to totally repaint the entire piece, but upon further research it just sounded like too much work and skills I did not possess. I settled on just doing the very tops of the drawers and updating the mirror that rests on the dresser (which also doesn’t match ANYTHING.)

Here is a list of all the things I used:

– Half yard of lace (from Jo-Anns)

– Heirloom White Rustoleum spray paint (from Menards)

–  Two new knobs to match spray paint (from Hobby Lobby); I decided to keep the pull knobs since they weren’t really that bad, so I also had to match the new knobs with these ones.

Total cost of dresser update: $ 8.55 (!!!). Thanks to some awesome sales and a little shopping around. So worth it.

Here are the before and after:

Before

After!

A Gift for Their Home

Posted on

This weekend a very dear friend of mine is getting married and I was searching for something to make that would be both special, and simple for their new life together.

The inspiration for this project came from this lovely picture I stumbled upon on Pinterest.

The original inspiration

But how to do it? At first I was thinking another needlework project, but the time commitment for that just wasn’t making me excited….so that was out. Then I remembered a piece of clearance fabric I had picked up a while ago. It’s a simple fabric; white, with white polka dots. Too much white. So I brewed some cheap, black tea and soaked the fabric for a spell and hung it out to dry. It was perfect! The tea gave the fabric the vintage-y look I wanted and I was super excited about that. I then ironed the fabric and started in on my own interpretation of the original artwork.

I used a basic fabric marker I picked up from Hobby Lobby, and I was fairly pleased with the results but I do wish the words were a little sharper. But you really can’t tell unless you’re looking real close and that’s just fine with me!

The finishing touch was putting the whole piece in a nice, basic brown frame I had also gotten from Hobby Lobby (gotta love that employee discount!).

Here’s a picture of the final product!

(apologies for it being backwards)

“A house is made of bricks and stones but a home is made of love alone”

A Cover for a Nook

Posted on

So it’s my step-sister’s birthday this weekend and she’s turning 13!

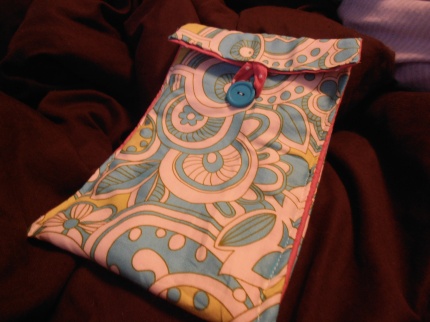
Being that she’s been in the family for a few years now, and she’s a little obsessed with her Nook she got for Christmas this year I decided to make her a cover!

You’ll remember my stint in making covers for Kindles back in February. Nooks are more tall than wide, where Kindles are the opposite and I am hell-bent to have gotten the measurements right!

I used some cute leftover fabric I found at home and just some fun buttons to make it reversible! I also used some more of the craft batting I had lying around and stuck with not putting the batting in the flap so it will close very nicely.

Happy Birthday Madelyn!

One side of the cover

The other side

A Summer Top to Wear

Posted on

Can I just say that this is one of my favorite things I have made to date? I may have already said that before but I think this time it’s for real.

So I have had this idea in mind for  awhile now to make a simple tank top or summery shirt and I have really been into floral prints lately so this beautiful floral cotton lawn (which is kind of like a linen fabric) immediately caught my attention. I wanted to add a little more texture to the design so I picked up a black eyelet cotton for the top of the tank top. As an added bonus, they were both on sale 🙂

The next step of the project was figuring out how to actually assemble the piece! Thanks to the world wide web, I found this SUPER helpful tutorial video ( http://bit.ly/QH5PiP ) that shows you step by step how to make your own tank top pattern! She doesn’t really tell you anything about how to cut the fabric once you’ve made the pattern, but the way I cut it was cut 2 on the fold ( I actually cut 4 because my fabric was really see-through!) for the whole pattern. Super easy. Some alterations I did myself was cut the bust line to make the black eyelet portion of the shirt.

I love the way it turned out even though the sleeves of the shirt are quite a bit larger than anticipated, so it’s less of a tank top and more of a cap sleeve shirt. I’m totally okay with that though because that means I can wear it to work!

such a fun print!

A Jacket for Cooler Temperatures

Posted on

Winter is great for crafting and craft blogging because you really don’t have to feel badly about staying indoors and working on projects all day.

Such is not the case for Summer.

Hence why I have been so sporadic this summer posting on projects that I’ve made, and also just plain ol’ finishing stuff I make! Yikes….

So anyways, I decided to finally make a fleece jacket I’ve been thinking about making for months now (and how ironic that it’s hotter than ever before outside). I just don’t think I was prepared for the immense challenge before me when I started this project!

For starters, I have never made a shirt before….all skirts and dresses, things with nice long seams and no sleeves! Collars are also very tricky. The pattern I used was McCalls and generally, I like those. They’re never usually very complicated and have generally better instructions than Simplicity patterns. But not this one. Oiy, I don’t know if it was for lack of practice with reading patterns on my part, or just the complexity of the project itself but there were several moments in the beginning of this project that I wanted to burn every piece of the thing!

Here are some things I learned along the way:

1. If the piece doesn’t fit, or make sense…get rid of it. It’s totally not worth the stress and frustration of trying to adhere to the pattern’s every word.

2. Fleece is not very fun to sew…too bulky.

3. The satisfaction of being able to wear and be comfortable in the self-made jacket is well worth the frustration it took to make the stupid thing.

So here is a photo of the finished product!


I do love the outdoorsy feeling I get from wearing this!

Something to Put Stuff In

Posted on

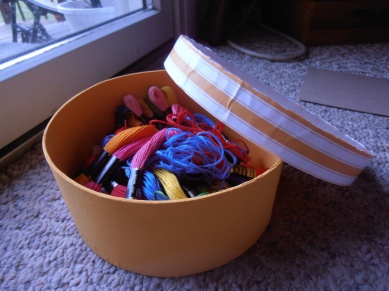
Well, now that I’m on this stint of making so many needlepoint projects and acquiring a lot of embroidery floss I decided it was high time to get something to put the darn stuff in.

This project literally cost me less than $5 thanks to some well-used coupons and killer deals happening this week!

I started with an unfinished paper mache round box, some cute yellow striped scrapbook paper and yellow paint to match all from Michaels.

Image

An open box

Thanks to Mod Podge and Psych for making this project happen 🙂

Image

A closed box

Some Headbands for a Baby

Posted on

The other day I saw a T-shirt that said “The bigger the bow, the better the momma”

Yikes.

But I think most people would agree, headbands are cute little accessories for baby girls so in light of this fact….I compromised.

Originally I had envisioned buttons attached to some thinner headbands but then thought those would be painful on her little head, so as an alternative I found some really great felt buttons at Hobby Lobby. They look just like buttons but are made completely out of nice, soft felt, and they came in a great multi-pack with all different shapes, sizes and colors. I was definitely a fan. This project takes the cake for the easiest and cheapest project to date!

And I think we can all agree that they’re really, really adorable.

white band with blues and yellows

a brown band with blues and yellows

Baby niece modeled her new headwear so nicely

A ‘Going Away’ Needlepoint

Posted on

Well, here I am! After a long hiatus of pretty much NO CRAFTING, I am back. 

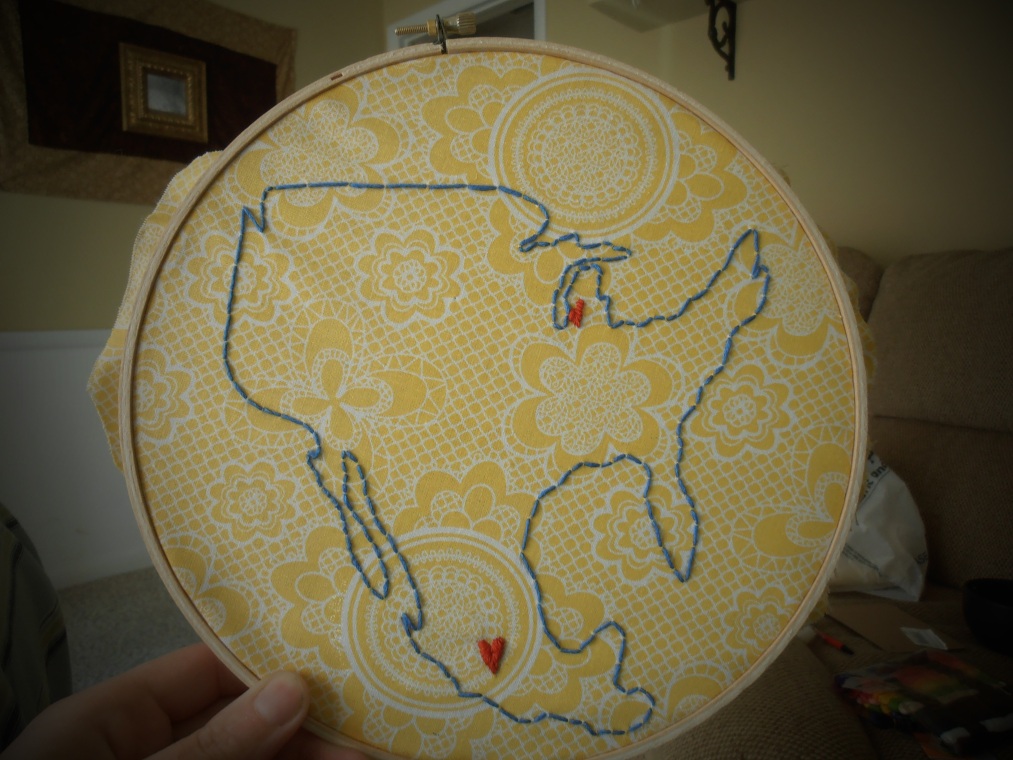
My best friend is moving to Mexico City for the summer doing pretty awesome work there and so as a little reminder how much I love her and will miss her, I made her a needlepoint. 

My other dear friend is an expert at needlepointing maps, so I got the inspiration for this project essentially from her. 

Image

A Maxi Skirt and Matching Headband

Posted on

A dear friend and fellow crafter and blogger birthed the original maxi skirt (check out her post here: http://bit.ly/HoUuul)  and after this reached the internet another dear friend said she wanted one.

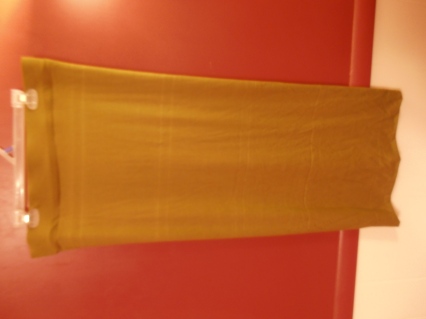
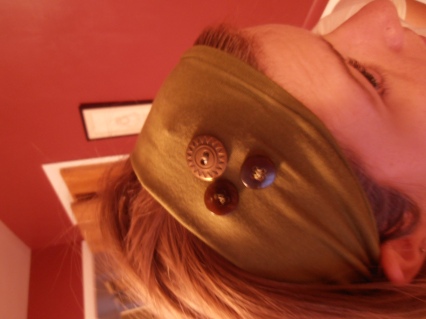
So here I enter into this story. With nothing more than just looking at the photos I figured I could probably make this happen. We made our way to Joann’s to purchase a knit fabric (decided on a nice olive-y green), thread and yes, another elastic band (this time I used a really wide yoga-ish band for comfort and effect).

After taking measurements and such I got started but let me tell you…working with a knit fabric was not as simple as I had thought before! It’s so so stretchy and that makes it really hard to control which makes me frustrated….

But I finally finished it and besides some final sizing tweaks, it is done! Due to an extreme overestimation on my part, I made her a really adorable headband from the same fabric because I had so much left over!

Image

the skirt

Image

the headband w/ buttons!

A Teeny Tiny Skirt for a Teeny Tiny Baby

Posted on

Well everyone, in case you haven’t noticed ’tis the season for babies being born and being loved. My fellow employees at Hobby Lobby will soon be celebrating the birth of a new little friend  and are throwing a baby shower for her this week.

So in honor of this new birth I decided to make a tiny skirt.

I started with some denim I had from a way long time ago and being that I have no idea the size of babies I just kind of guessed…..so I knew I wanted to make a skirt but I wanted to be both cute AND practical for a new little baby so I went with the classic elastic waistband. This waistband went in a lot smoother than the previous elastic waistband escapade I tried which was helpful!

close up of applique

Now, since I didn’t want this to be a boring baby skirt I decided to add a little animal flare. Owls are in right now, yes? It was tricky to make all the details so tiny to fit on this tiny skirt but it looks pretty darn adorable.

a view of the whole skirt